


28 Sep How to Build a Healthy Compost Pile in Your Backyard
A forgotten bag of grass clippings slumps in the corner of the yard, already smelling sour. A pile of dry leaves sits untouched nearby. Most backyard compost problems start this way: good materials, wrong balance. Building a healthy compost pile is less about buying the perfect bin and more about understanding what the microbes in that pile actually need. If you want a practical starting point for choosing equipment, The Village Gardener offers a solid look at compact backyard composting systems. Whether you are working with a simple wire bin or want to troubleshoot a pile that has stalled, the core principles stay the same.
Quick Answer
To build a healthy compost pile, combine roughly two to three parts dry, carbon-rich material by volume with one part green, nitrogen-rich material. Chop everything into smaller pieces, keep the pile as damp as a wrung-out sponge, turn it every week or two, and aim for a volume of at least three feet wide, tall, and deep so it can hold heat. A healthy pile heats up within a few days, smells earthy rather than foul, and shrinks steadily as it breaks down.
Key Takeaways
- Aim for a carbon-to-nitrogen ratio near 25:1 to 30:1 by volume, which in practice means roughly two to three buckets of browns for every bucket of greens.
- Pile size matters more than most beginners expect; below about three cubic feet of material, a pile struggles to hold the heat composting microbes need.
- Turning frequency is a trade-off: more turning speeds decomposition but costs time and labor, while less turning favors fungi and produces compost slowly.
- Foul smells, slime, and pests almost always point to excess moisture or too many greens, not to bad luck.
- Compost is finished when it is dark, crumbly, smells like forest soil, and the original materials are no longer recognizable.
What a Healthy Compost Pile Actually Needs
Composting is a microbial process, and microbes have four basic requirements: food, water, air, and warmth. Every practical decision you make, from what you throw in the bin to how often you turn it, comes back to those four factors. Get them roughly right and the pile does the work on its own.
Food means the right blend of carbon and nitrogen. Carbon-rich materials give microbes energy, while nitrogen-rich materials give them protein for growth and reproduction. Water keeps the environment hospitable, but too much water drives out air. Air matters because the most efficient composting microbes are aerobic, meaning they need oxygen. Warmth is mostly a byproduct: when the pile is large enough and balanced enough, microbial activity generates heat, which in turn accelerates the whole process.
One thing a healthy pile does not need is a starter or accelerator product. The microbes that break down organic matter are already present on plant surfaces, in soil, and in the air. A handful of finished compost or garden soil can help inoculate a new pile, but it is not required.
The Browns and Greens Balancing Act
The single most common reason backyard compost piles fail is an imbalance between browns and greens. Browns are dry, dead, carbon-rich materials such as fallen leaves, straw, shredded cardboard, sawdust, and dead plant stems. Greens are fresh, moist, nitrogen-rich materials such as grass clippings, kitchen scraps, coffee grounds, and fresh garden trimmings.
The ideal carbon-to-nitrogen ratio for fast composting is around 25:1 to 30:1. Translating that ratio into everyday kitchen and yard measurements is easier than it sounds. Since browns like leaves and cardboard are much less dense than wet greens, a practical rule is two to three parts browns by volume for every one part greens.
Here is what that looks like in practice:
- Typical mix: three buckets of shredded leaves, one bucket of grass clippings
- Too many greens: one bucket of leaves, three buckets of grass clippings, plus kitchen scraps
- Too many browns: a pile of leaves with almost nothing fresh added, which will sit for years without much happening
The classic symptom of excess greens is a slimy, ammonia-smelling pile. The classic symptom of excess browns is a dry, inert pile that never heats up. Both are fixable, and neither requires starting over, Before updating your outdoor space or undertaking sustainable home projects, make sure you also review safe disposal methods like eco-friendly window glass disposal to keep your property safe.
How to Build the Pile, Step by Step
Building a healthy pile from scratch takes about half an hour if you already have materials on hand. Treat the process as layering, then adjusting, rather than getting every proportion perfect on the first try.
- Choose a spot with drainage. Compost should sit on soil or a permeable surface, not on concrete, so excess water can drain and soil organisms can move up into the pile. Partial shade keeps the pile from drying out too quickly in summer.
- Build a base of coarse browns. A layer of small twigs, corn stalks, or chunky stems about four to six inches deep allows air to move up from below.
- Alternate thin layers. Add two to three inches of greens, then four to six inches of browns, and repeat. Chop or shred materials as small as you reasonably can; smaller pieces break down much faster than whole leaves or intact stalks.
- Water as you build. Spray each layer lightly. You are aiming for the moisture level of a wrung-out sponge, meaning the material feels damp but you cannot squeeze water out of it.
- Finish with browns on top. A brown cap reduces odors and discourages fruit flies and other pests from reaching kitchen scraps.
- Add a starter handful if you like. A scoop of finished compost, garden soil, or even a little aged manure introduces a healthy microbial population.
- Build volume. Keep adding until the pile is at least three feet in each direction. Smaller piles rarely heat up no matter how well they are built.
Once the pile is built, the work shifts from construction to maintenance.
Moisture, Temperature, and Turning
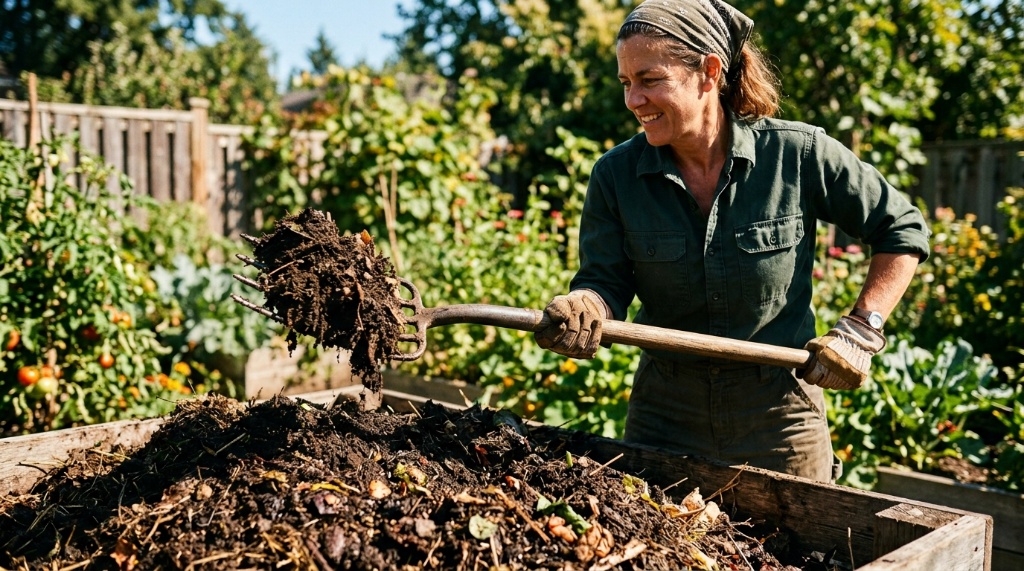
These three variables interact, and managing them together is the difference between fast compost and a pile that sits unchanged for a year.
Moisture is the easiest to check by hand. Grab a handful from about a foot inside the pile and squeeze. If it drips, it is too wet; add browns and turn. If it crumbles and feels dry, add water and turn. The target is damp and spongy, not soaking.
Temperature tells you whether microbial activity is happening and whether it is aerobic. A well-built pile should reach 130°F to 160°F within a few days. A long-stemmed compost thermometer is helpful, but you can also judge by feel: a warm pile radiates heat when you push a metal rod into the center and leave it for a few minutes. If the pile is not heating, the most likely culprits are too little material, too dry, too wet, or too few greens.
Turning frequency is a genuine trade-off rather than a rule to follow blindly.
| Turning Approach | Typical Timeline | Best For |
|---|---|---|
| Turn every 1–2 weeks | Finished compost in roughly 1 to 3 months | Gardeners who want fast results and can invest the time |
| Turn monthly or occasionally | Finished compost in roughly 3 to 6 months | Most backyard gardeners balancing effort and speed |
| Rarely or never turned | Finished compost in roughly 6 to 12 months | Low-effort setups, especially where fungi do more of the work |
More turning adds oxygen, which keeps the pile hot and aerobic but also releases moisture and heat. Fewer turning favors slower-working fungi and other organisms that handle tougher materials like woody stems and leaves more effectively.
What to Compost and What to Keep Out
Most plant-based kitchen and yard waste belongs in the pile. Fruit and vegetable scraps, coffee grounds and filters, tea leaves, eggshells, grass clippings, leaves, garden trimmings, and plain shredded paper or cardboard are all fine. Chop or shred anything bulky, and bury kitchen scraps in the center to discourage pests.
Some common materials are better kept out, or used only with specific precautions:
- Meat, dairy, and greasy foods: these attract rodents and produce strong odors in home-scale piles
- Pet waste from dogs and cats: can carry pathogens and parasites that backyard piles may not reach high enough temperatures to destroy
- Diseased plants: unless your pile reliably heats above 130°F throughout, disease organisms can survive and spread
- Weeds that have gone to seed or aggressive spreaders: seeds and roots may survive a cool pile and reseed your garden
- Treated or painted wood, glossy paper, and charcoal ash: may contain compounds you do not want in your finished compost
Grass clippings deserve special mention. They are a good nitrogen source, but in thick layers they mat down, block air, and turn slimy. Mix them into browns rather than dumping them in a solid layer.
Troubleshooting Common Compost Problems
When something goes wrong, the fix is usually a single adjustment rather than a complete rebuild. Here are the most common problems and their likely causes.
- Pile smells sour or like ammonia: too many greens or too much water. Add browns, turn thoroughly, and check moisture.
- Pile smells like rotten eggs: the pile has gone anaerobic from compaction or waterlogging. Turn it to introduce air and add dry browns.
- Pile is not heating: the pile may be too small, too dry, low in nitrogen, or already finished. Add greens, water to the wrung-out sponge level, and add volume.
- Fruit flies or gnats: kitchen scraps are exposed on the surface. Bury new scraps in the center and cap with browns.
- Rodents visiting: usually due to meat, dairy, or greasy foods in the pile. Remove those materials and consider a rodent-resistant bin.
- White mold on the surface: generally harmless and a normal part of decomposition. Turn it under.
- Pile dries out quickly: common in hot, windy, or sunny locations. Add water, turn, and consider a partial shade cover or a lid.
How to Know When Compost Is Finished
Finished compost is dark, crumbly, and smells like rich forest soil. The original materials should no longer be recognizable; a few stubborn stems or eggshell fragments are fine. The pile will have shrunk to roughly a third of its original volume, will no longer heat up even after turning, and will be cool to the touch. Let finished compost cure for a week or two before using it, and screen out any large chunks for the next batch.
If the compost is ready before you need it, store it in a covered bin or pile and keep it slightly damp. It keeps for months without losing quality.
Frequently Asked Questions
How long does it take to make compost?
With regular turning and a well-balanced pile, compost can be ready in as little as one to three months. Less frequent turning typically produces finished compost in three to six months, and a neglected pile can take a year or more. The biggest factors are pile size, moisture, and how often you turn it.
Do I need to buy a compost bin or accelerator?
No. A simple wire bin or open pile works fine, and compost accelerators are not necessary if the pile is balanced. The microbes needed for decomposition are already present in soil, air, and plant material. A bin mainly helps contain the pile and keep it looking tidy.
Can I compost in winter?
Yes, but the process slows dramatically in cold weather. The pile will likely go dormant or freeze, then resume activity once temperatures rise in spring. Building a larger pile in fall and insulating it with a layer of leaves or straw can help it stay active longer.
Why is my compost pile not heating up?
The usual causes are a pile that is too small, too dry, too wet, or short on nitrogen. Add greens such as grass clippings or kitchen scraps, water to the wrung-out sponge level, and make sure the pile is at least three feet in every direction. Heating should resume within a few days.
Can I put citrus peels and onions in compost?
Yes, in moderate amounts. Citrus peels and onion scraps break down fine in a healthy aerobic pile. The main concern is that large quantities of citrus can temporarily slow microbial activity, and strong-smelling scraps may attract pests if left on the surface.
Is compost safe to use on vegetables?
Finished compost from a properly managed backyard pile is generally safe for vegetable gardens. Avoid adding pet waste, meat, or diseased plants, and let the pile cure fully before use. For root vegetables, applying compost several weeks before planting is a common practice.
Conclusion
A healthy compost pile comes down to four things: the right brown-to-green balance, steady moisture, enough air, and sufficient volume. Start with a mix of roughly two to three parts browns to one part greens, keep it as damp as a wrung-out sponge, turn it every week or two if you want fast results, and let the pile do the rest. Expect some trial and error; every pile behaves a little differently depending on climate and materials. Check moisture weekly, adjust as needed, and you will have finished compost to feed your garden within a few months.
Sorry, the comment form is closed at this time.